
WhatsApp is where most guest conversations happen. Taskbeast gives you a working WhatsApp channel from day one: a shared sender operated by Taskbeast that you can use immediately, before you register a number of your own.
Start with the shared sender
Every new account can message guests through the shared Taskbeast WhatsApp number. There is nothing to configure — it is already listed on your account.
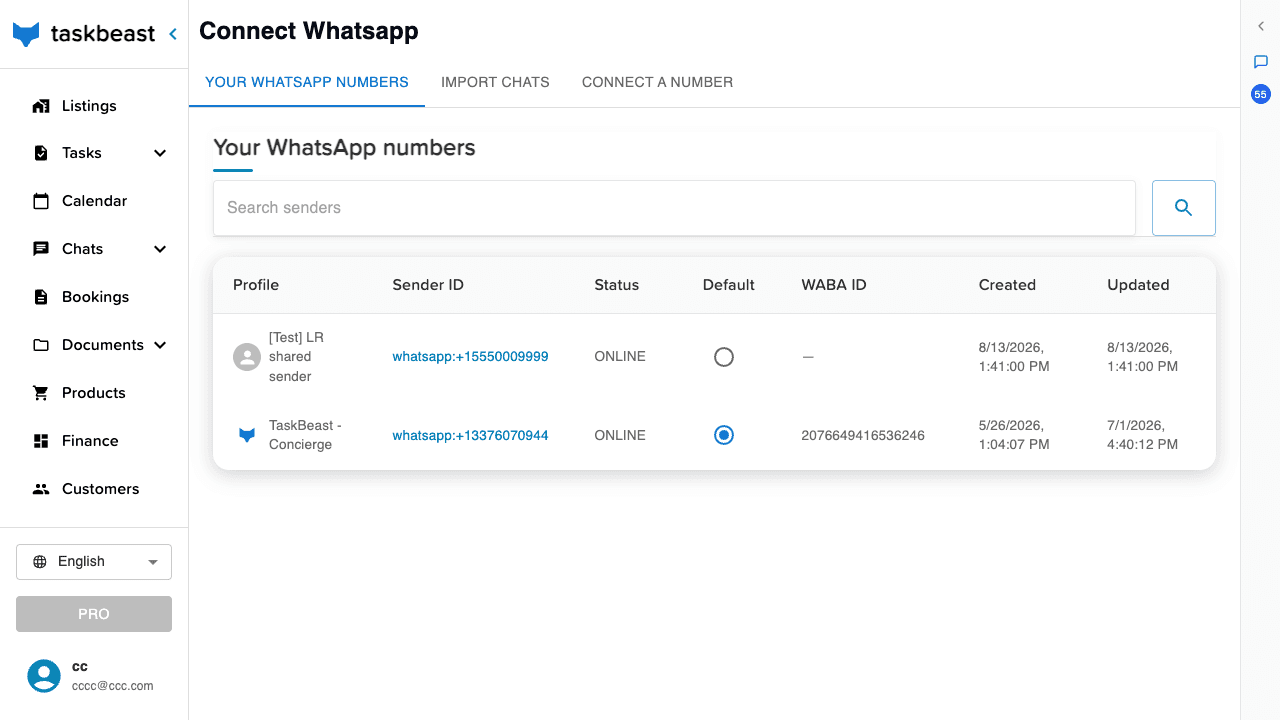
- 1Open Channels → Whatsapp in the left sidebar. The Your WhatsApp numbers table lists the senders available to you.
- 2The shared sender is already there. Make sure its Default radio button is selected — the default sender is the number used for outgoing guest messages.
Send your first message
Open Chats → Conversations: every booking with a phone number already has its own conversation. Pick one, type in the composer and press Enter — the message is delivered from your default WhatsApp sender. From the same page you can also:
- Write to any number — click the pencil icon inside the search field at the top of the conversation list, type the phone number, and create the WhatsApp conversation. You can message anyone, not just guests with a booking.
- Write to a guest from their booking — open the booking from the Bookings page or the calendar and click the WhatsApp icon in the booking’s toolbar: the guest’s conversation opens, created on the spot if it doesn’t exist yet.
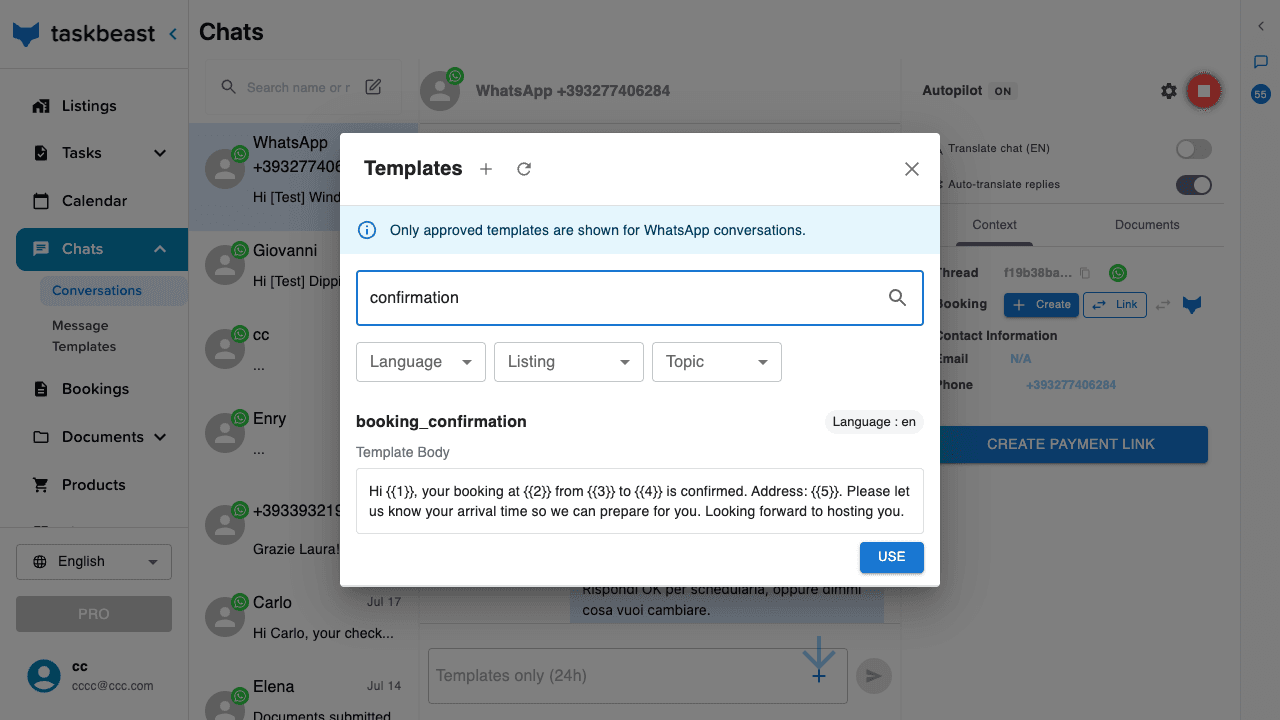
- Send a template — in any conversation, click the + next to the composer and choose Templates: search or filter the list, then press Use on the one you want. Variables like the guest’s name are filled in from the booking.
The 24-hour window, and how Taskbeast handles it
One WhatsApp rule to know: Meta lets a business reply freely only for 24 hours after the guest’s last message. Once the window closes, only templates approved by Meta in advance are delivered. Taskbeast handles this for you:
- It watches the clock. The window is tracked on every conversation; if it’s closed, Taskbeast tells you and proposes an approved template instead — nothing is silently dropped.
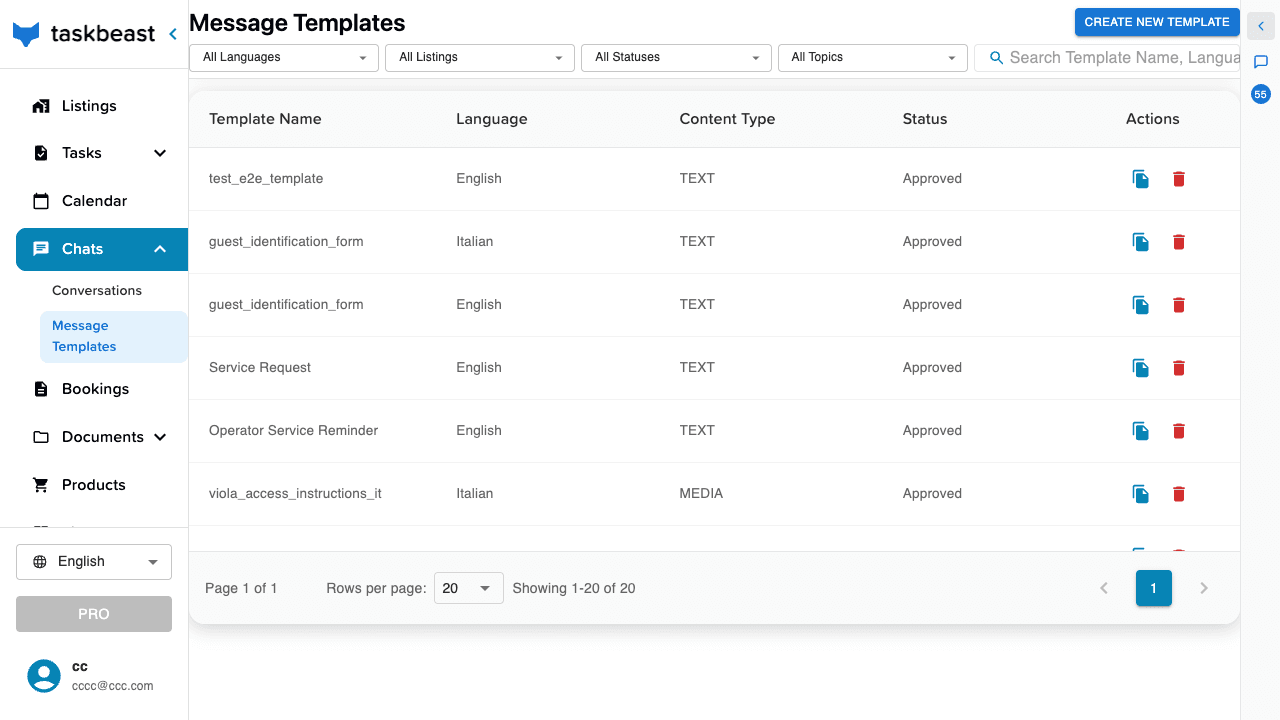
- It gets templates approved. Write a template once in Chats → Message Templates, submit it to Meta from the same screen, and follow it to approved. Linked to a task, a reminder can always be delivered (see the automated-tasks tutorial).
- Nothing gets lost. A message blocked by a closed window is kept; when the guest replies and the window reopens, the assistant delivers it if it’s still relevant.
Good to know: The window is WhatsApp-only — Airbnb, Booking.com and the direct-booking site have no 24-hour rule and no template approval.
Create your own WhatsApp number
When you want messages to come from your own brand and number, register a dedicated WhatsApp Business sender. The whole flow happens on one page, in three numbered steps, and takes about ten minutes. Before you start, have two things ready: a Facebook (Meta) account (a business account can be created during the flow if you don’t have one), and a phone number for the new sender — you can bring your own or buy one from Taskbeast during the process. Use a desktop browser: the Facebook step doesn’t work on phones.
Step 1 — choose the phone number
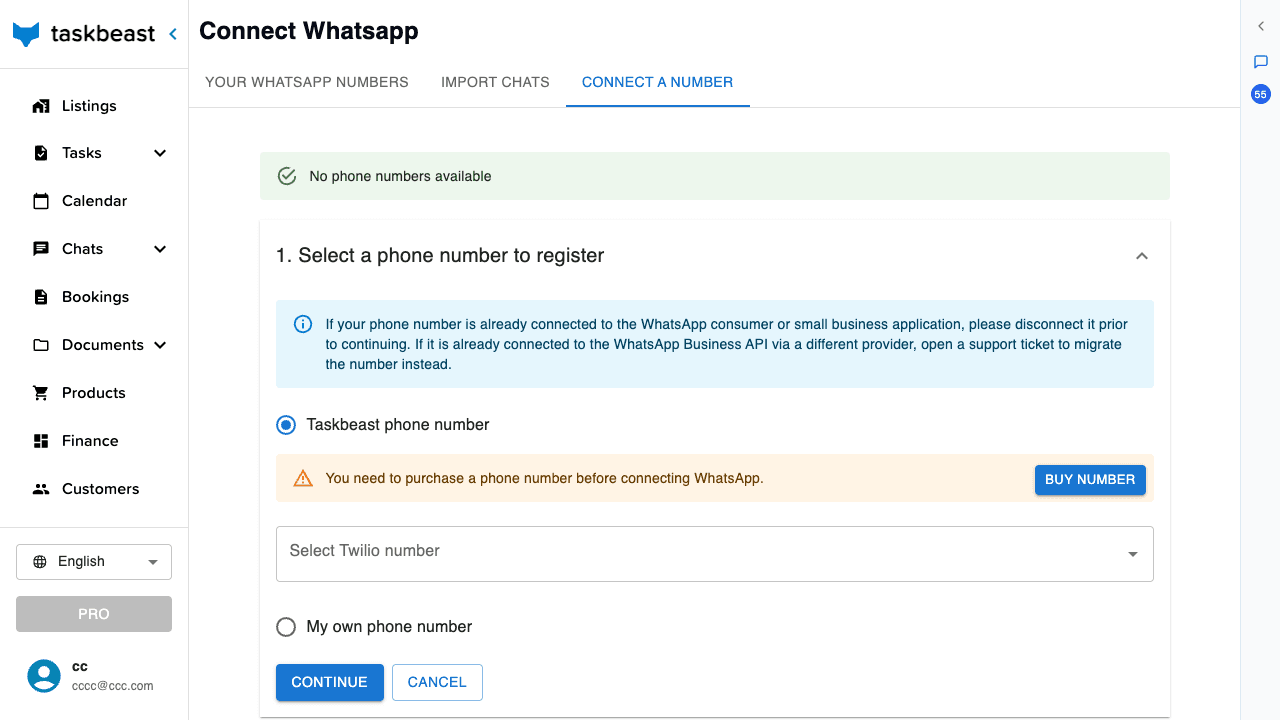
On Channels → Whatsapp, open the Connect a number tab. The first panel asks which number the sender should use:
- Taskbeast phone number — buy a fresh number through Taskbeast with Buy Number, then pick it from the list. This is the simplest path: a new number has no WhatsApp history to worry about.
- My own phone number — type your number in international format (for example +39 333 1234567). Important: the number must NOT already be registered on the WhatsApp app. If it is, disconnect it in WhatsApp first (Settings → Account → Delete account only removes WhatsApp registration, your phone plan is untouched); if it is on the WhatsApp Business API with another provider, that provider must release it first.
- 1Select your option, then click Continue.
Step 2 — link your WhatsApp Business Account
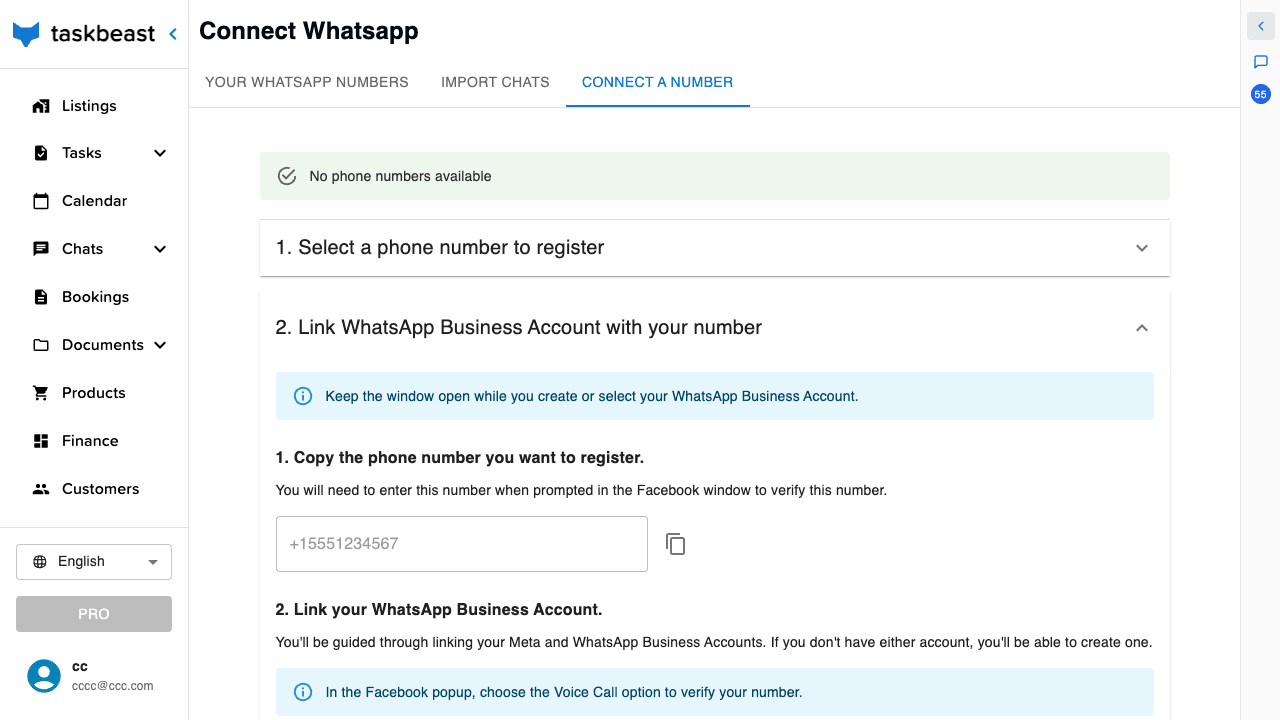
- 1Copy the phone number shown — you will be asked to type it inside the Facebook window.
- 2Click Continue with Facebook. A Facebook window opens; log in and follow the guided setup. It walks you through choosing or creating your Meta business and your WhatsApp Business Account — if you have neither, you can create both right there.
- 3When Facebook asks for the number, paste the one you copied, and choose Voice Call as the verification method.
- 4Keep the Taskbeast page open in the background the whole time.
Step 3 — verification happens by itself
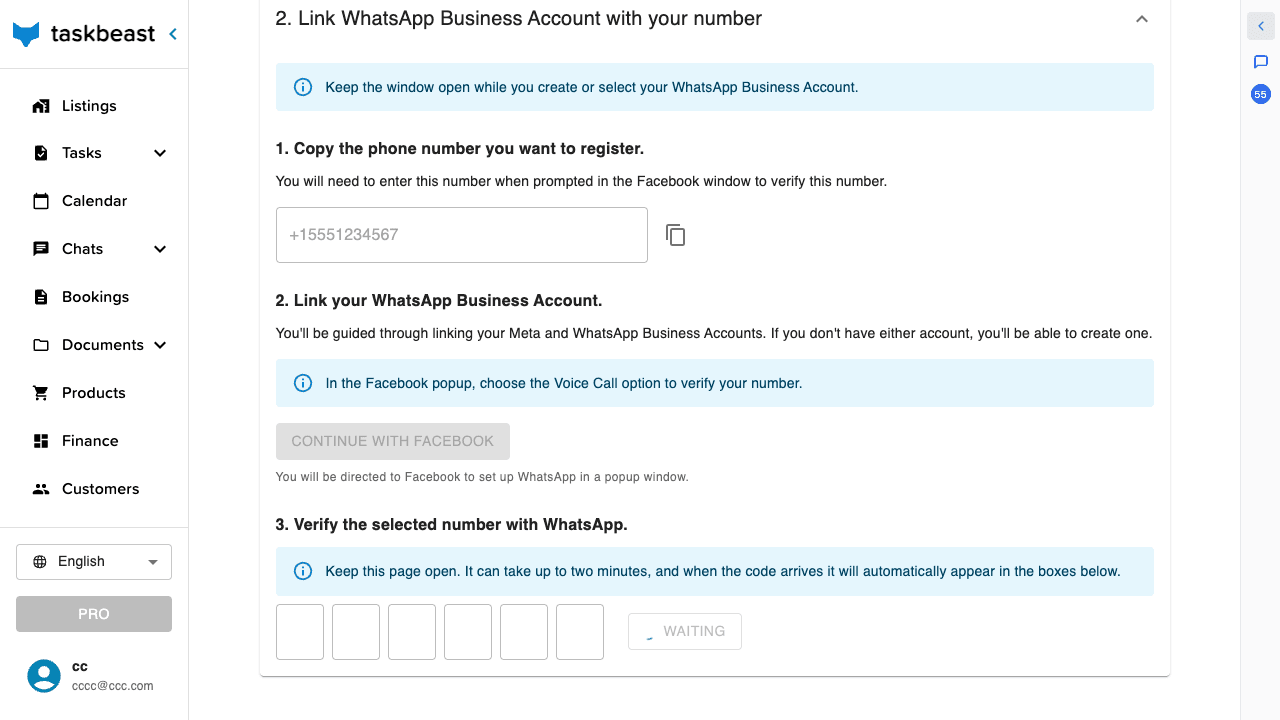
After the Facebook window closes, the page waits for WhatsApp’s verification code. You don’t have to fetch it: the code arrives on its own — it can take up to two minutes — and fills the boxes on the page automatically. Keep the page open until it does.
That’s it: the new sender appears in Your WhatsApp numbers with status ONLINE.
- 1Select the new sender’s Default radio button — from now on, all guest messages go out from your number.
- 2Optionally, bring your history along: the Import chats tab imports your existing WhatsApp conversations (see the chat-import tutorial).
Good to know: Your templates and automations keep working unchanged — they simply start sending from the new number.
More tutorials
Connect Airbnb and Booking.com
Import your listings from Airbnb and Booking.com, keep prices and availability in sync, manage rate plans, and merge the same apartment across channels.
A phone number for your rentals
Buy a dedicated number in minutes: calls from guests reach you with a professional greeting, and the same number can power WhatsApp.
Message templates: your key to WhatsApp deliverability
Build templates that Meta approves, fill them with variables that resolve themselves, and make sure your messages always reach guests — even outside the 24-hour window.