
Taskbeast never touches your money: payments go straight to your own Stripe account. Connecting it once unlocks everything that collects money — the checkout on your direct-booking website, the payment links the assistant sends to guests, and the orders for extra services. And because every one of those flows through your Stripe, the Transactions page can show you charges, fees and net revenue in one place.
Connect Stripe
- 1Open the listing from Listings and go to the Finance tab, then the Direct payments section.
- 2Start the connection: you are redirected to Stripe to complete the required information — identity, bank account for payouts, business details. After submitting you return to Taskbeast automatically.
- 3If you don’t have a Stripe account yet, the same flow creates one — it takes about ten minutes and requires an ID document and your IBAN.
- 4The connection belongs to the property owner and covers their listings — you do not repeat it per listing.
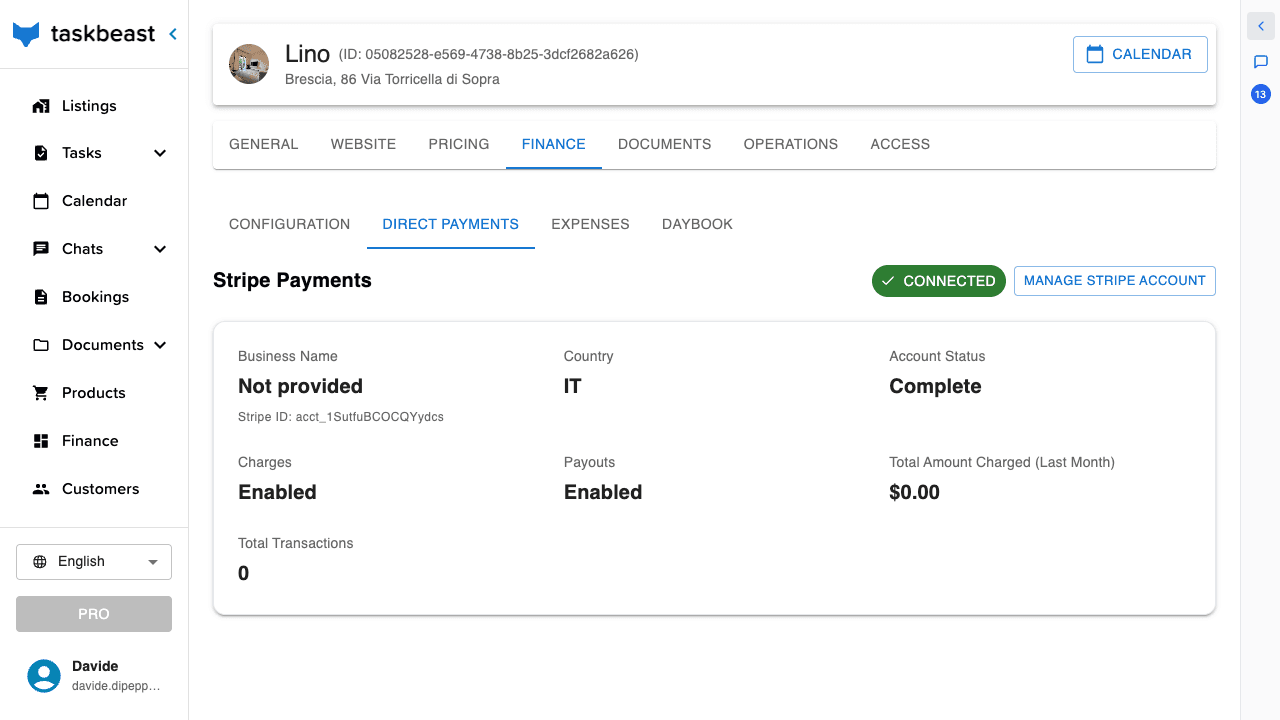
Good to know: You will also find a Connect Stripe shortcut on the listing’s Website tab whenever Stripe is missing — same destination. Until onboarding is fully complete (no pending requirements on Stripe’s side), payments stay disabled and the shortcut keeps showing.
Your booking website starts charging
The direct-booking page you set up in the calendar-and-website tutorial works without Stripe — guests can see prices and availability — but it can only take real bookings with payment once Stripe is connected. Nothing else to configure: as soon as onboarding completes, the page’s checkout goes live, guests pay by card, and the money lands in your Stripe account with no channel commission.
The booking appears in Taskbeast like any other: the calendar closes the nights everywhere, your automations fire, and the payment is already marked as received.
Payment links guests can actually pay
With Stripe connected, the assistant can mint payment links on request — “send Anna a payment link for the €30 late checkout”. Two kinds exist, and one is better than the other:
- Order payment links (preferred) — when you sell something as a product on an order (see the sell-extras tutorial), the order carries its own Stripe checkout link that always matches the order total and is payment-tracked: the moment the guest pays, the order is marked Paid in your books, automatically.
- Ad-hoc links — a bare link for an arbitrary amount. It works, but nothing reconciles it: prefer adding the charge as an order item and sharing that order’s link.
Watch the money: the Transactions page
- 1Open Transactions in the left sidebar — it is the Stripe ledger of your account.
- 2Read the five cards on top: Total charges, Stripe fees, Platform fees, Refunds and Net revenue. Charges − fees − refunds = net; the cards always reflect the applied date filter.
- 3Use the quick ranges (Today / 7 days / 30 days / 1 year) or set explicit From/To dates and press Apply.
- 4Click a row’s arrow to expand it: processing fee, tax, what you received, plus the listing, customer and stay dates behind the charge.
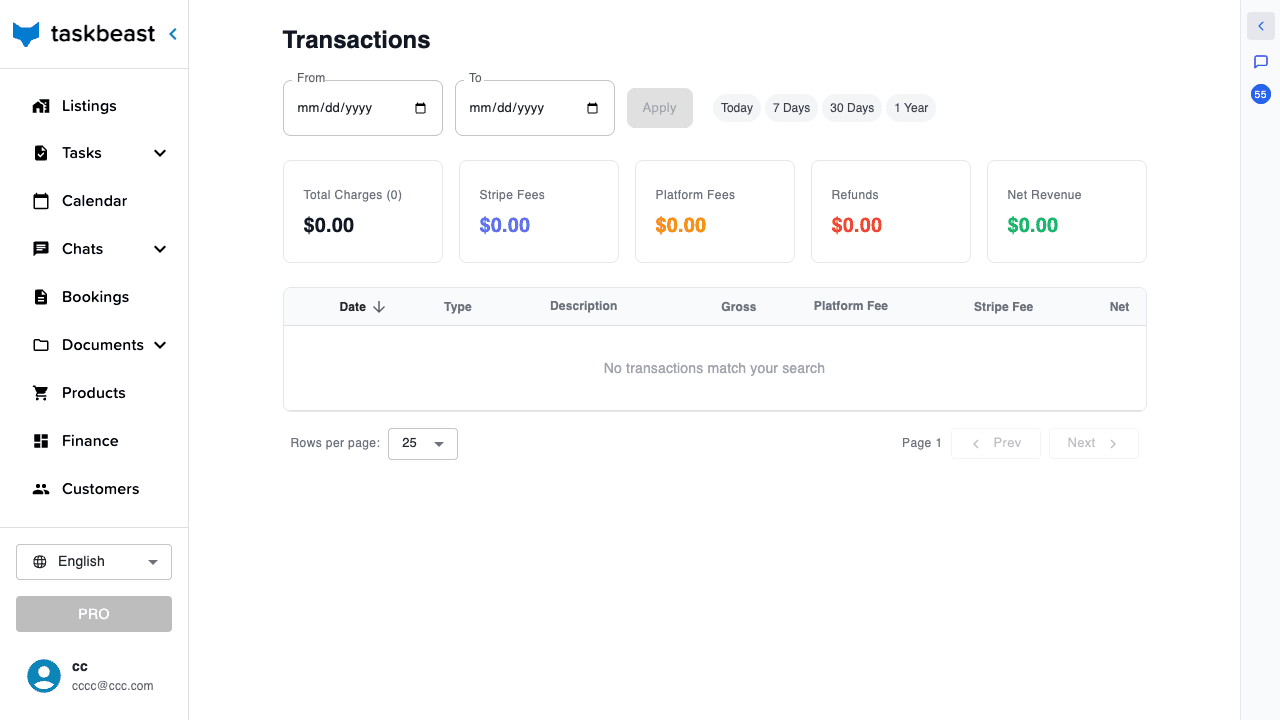
Good to know: An empty page with a “connect Stripe” prompt means the account isn’t wired up yet — not that you earned zero.
The rest of your money setup
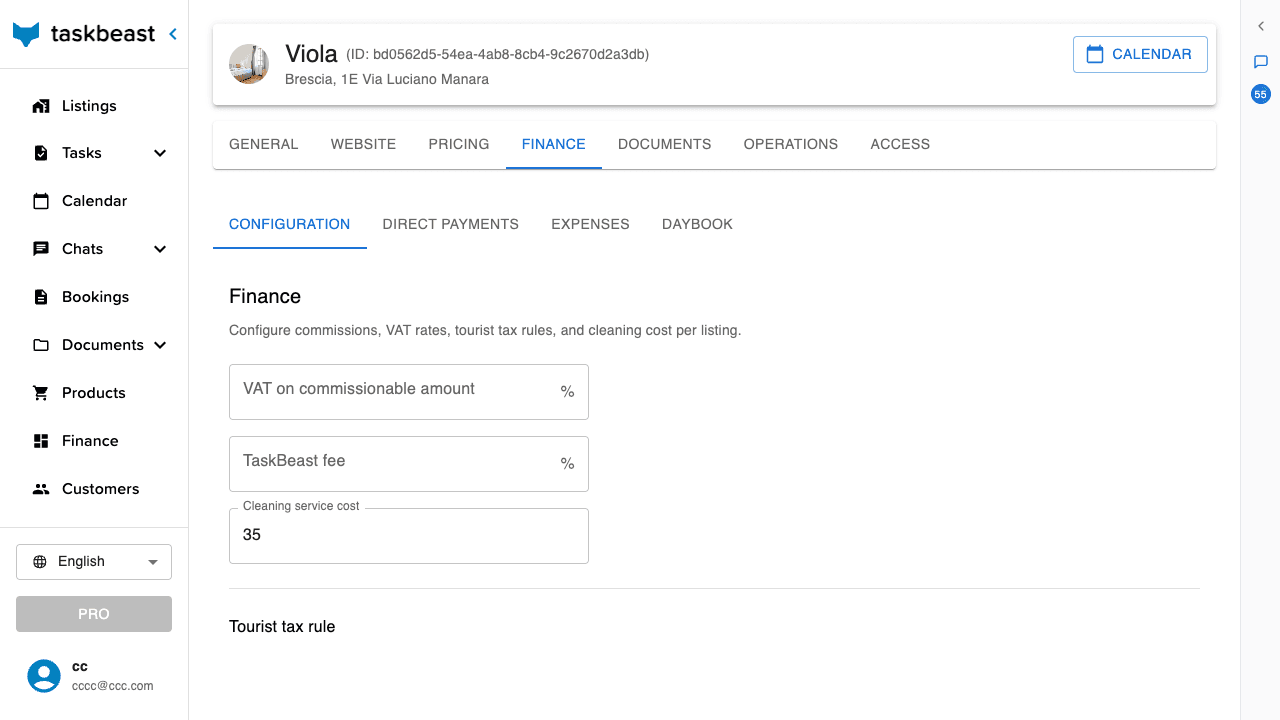
The listing’s Finance tab holds the money configuration that feeds every calculation:
- Configuration — tourist-tax rules (per adult/child, with a nights cap), which OTAs collect the tax for you, VAT settings, your cleaning cost and management fee.
- Expenses — a per-listing expense ledger (date, amount, tag, optionally tied to a booking) that flows into the Finance page reports.
- Daybook — the cash journal: every inflow and outflow in date order, with running totals. Stripe payments write themselves in; cash you record by hand shows as manual.
More tutorials
Prices, manual bookings and your own booking website
Set nightly prices in the calendar, register offline bookings, publish your listing on your own direct-booking page, and keep every rate plan aligned.
Sell extras: products, orders and customers
Build a catalog of extra services once, charge guests in two clicks with tracked Stripe links, and keep a customer book that remembers everyone.
Track your numbers with the Finance page
Build your own financial variables, chart them, shape the bookings and expenses tables to your workflow, and save it all as reusable views.