
The Calendar is where you steer prices and availability for every listing and every channel at once — and with the built-in booking website, it is also where your commission-free direct bookings land.
Set prices in the calendar
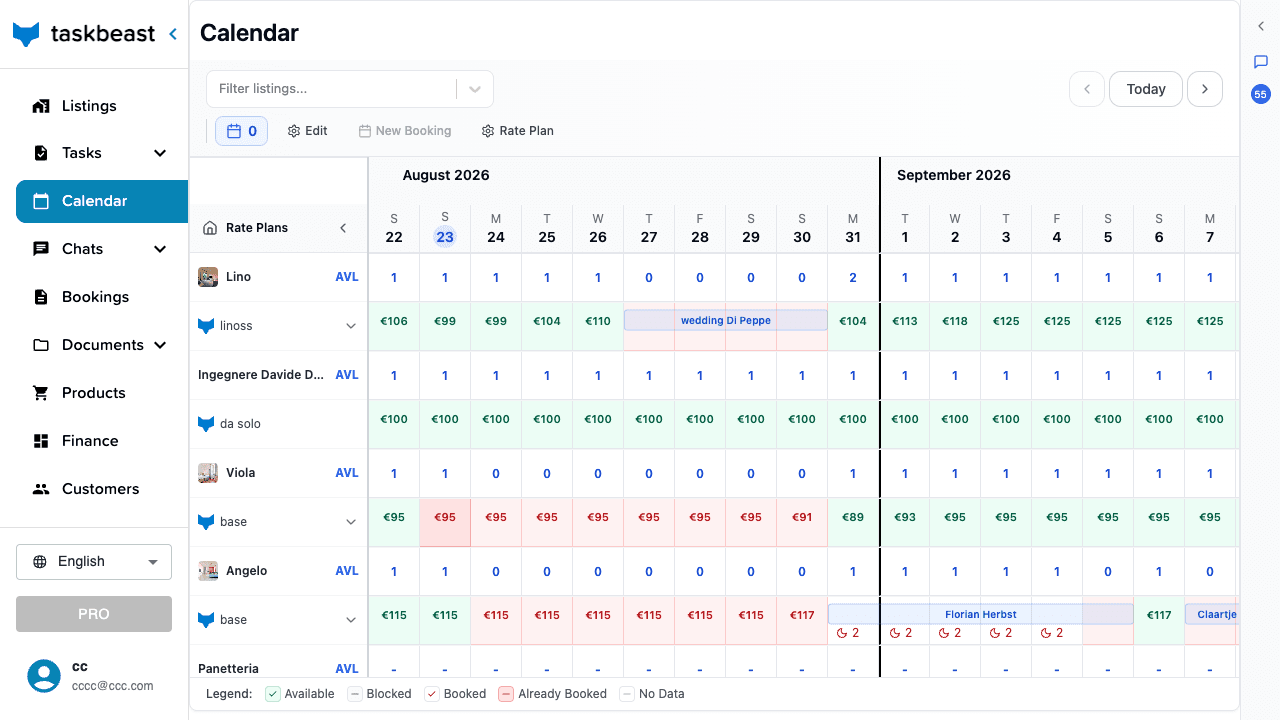
- 1Open Calendar in the left sidebar. Each row is a listing, each column a night; green cells are available, pink ones booked.
- 2Click and drag across the nights you want to change — the selection counter appears in the toolbar.
- 3Click Edit, type the new nightly price (you can also change availability, minimum stay or close the dates), and confirm.
- 4The new prices are live on Airbnb and Booking.com within moments.
Create a manual booking
A guest booked by phone or email? Register the stay so the nights close everywhere.
- 1In the calendar, select the free nights of the stay on the listing’s row.
- 2Click New Booking — it activates only when every selected night is available.
- 3Enter the guest’s name, phone number and the total price, then confirm. The booking behaves like any other: automations fire, the check-in form goes out, the nights are blocked on all channels.
Set up your booking website
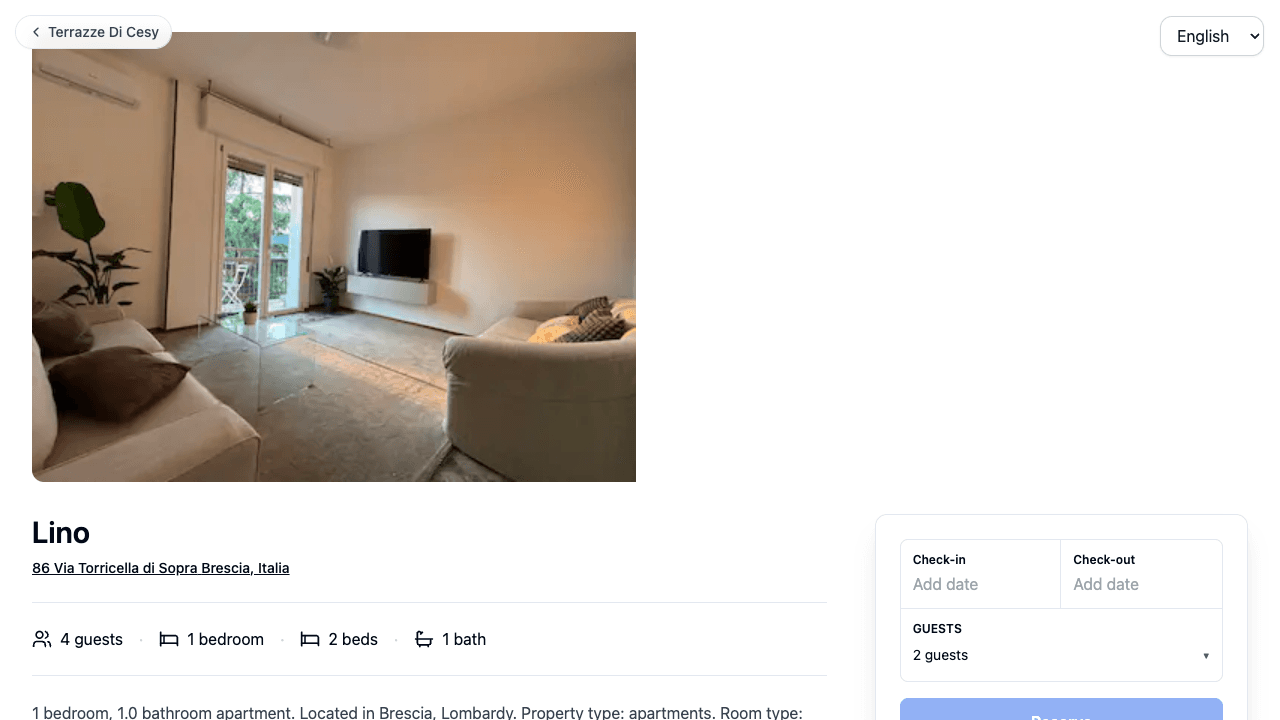
Every listing can have its own public page where guests book directly — no commission. The page lives on your account’s own web address: https://your-name.taskbeast.ai/listing-identifier/booking, where your-name is a site name you choose once for the whole account, and each listing adds its own identifier. The site’s front page (your-name.taskbeast.ai) is a landing page with your name and logo that lists your bookable apartments.
- 1First, claim your site name: open your Profile (your avatar, top right) and create the domain in its Domain section — pick something short and readable, like your brand name; it becomes the
your-namepart of every booking link. Until this exists, the Website tab’s Copy link stays disabled and asks you to configure the domain first. The same Profile section holds the landing page’s title and logo. - 2Then open the listing from Listings and go to the Website tab.
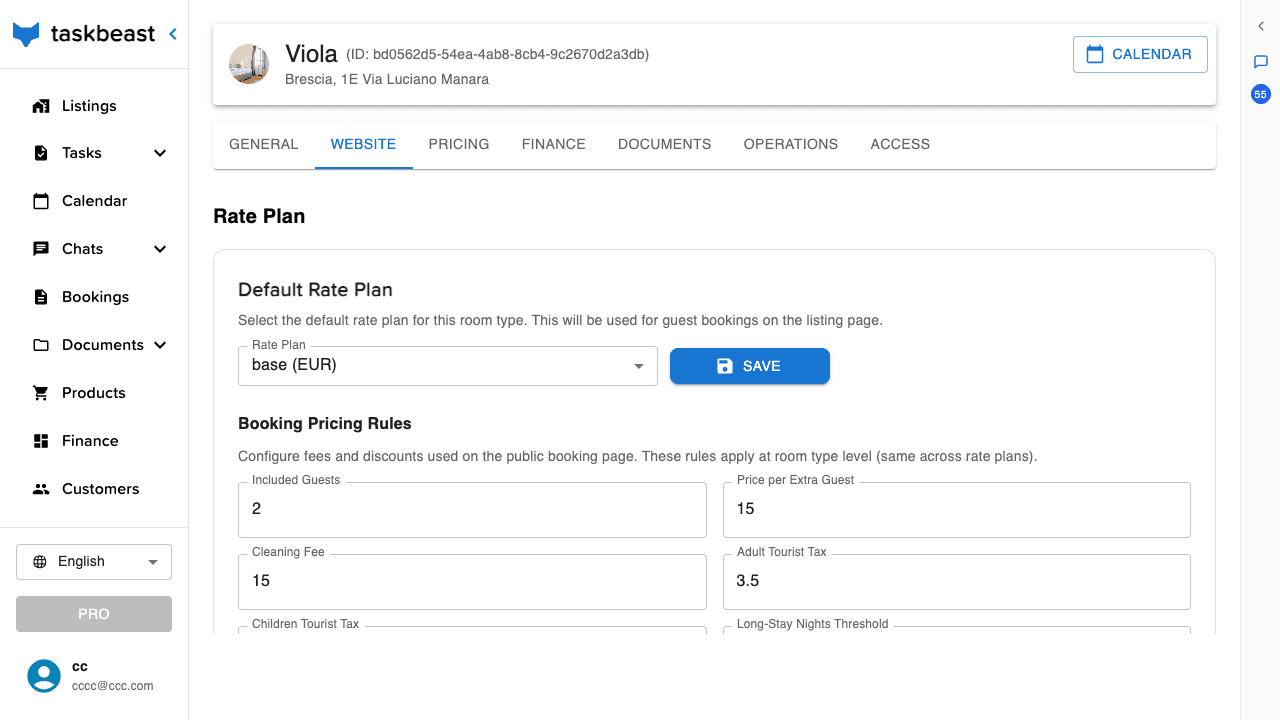
- 3Pick the Default rate plan the page should sell and save.
- 4Fill the Booking pricing rules: included guests, price per extra guest, cleaning fee, tourist tax, long-stay discount.
- 5Give the page a readable address in Listing Identifier (for example /casa-viola — without one, the link falls back to a long technical id) and add your best photos, choosing a feature image.
- 6Connect Stripe (from the listing’s Finance tab) so guests can pay online, then use Copy link to share your page.
Receive direct bookings
Share the link on your social profiles, in your email signature, or send it to returning guests. When someone books, the reservation appears in Taskbeast like any other booking: the calendar closes the nights on every channel, automations run, and payment arrives through your own Stripe account — with no channel commission taken.
Keep rate plans aligned with deltas
When you steer prices from the calendar, you only ever touch the base rate plan. In the listing’s Pricing tab, set each other plan as a percentage above or below the base and click Send Update — from then on, one price change in the calendar reprices every plan on every channel, in proportion.
More tutorials
Get paid: Stripe, your booking website and payment tracking
Connect Stripe once and everything can collect money — your direct-booking website, payment links, product orders — with every euro tracked on the Transactions page.
Sell extras: products, orders and customers
Build a catalog of extra services once, charge guests in two clicks with tracked Stripe links, and keep a customer book that remembers everyone.
Track your numbers with the Finance page
Build your own financial variables, chart them, shape the bookings and expenses tables to your workflow, and save it all as reusable views.